Learn how to log in, navigate the dashboard, switch facilities, and find the information you need within the NRDR Portal.
- Log in using your ACR Account.
- Access all registries associated with your user account.
- Switch between facilities without logging out.
- Use the Dashboard to access data, reports, resources, and account management.
- Your session automatically ends after 20 minutes of inactivity.
Login to the Portal
Click Login with ACR Account to access all registries associated with your NRDR account.

See Change Account Details for instructions on updating your password or recovering access to your account.
Understanding the Banner
The banner at the top of the portal displays:
- Your name
- Corporate Account
- Facility ID
- Facility Name
To sign out, click the dropdown arrow next to your name and select Logout.

Working with Multiple Facilities
If you have access to multiple facilities, use the facility dropdown to switch between locations without logging out.
When you select a different facility, the dashboard updates automatically to display information specific to that location.

NRDR Dashboard
The Dashboard is the first screen displayed after login. It contains announcements, quick access tools, and navigation to all portal areas.
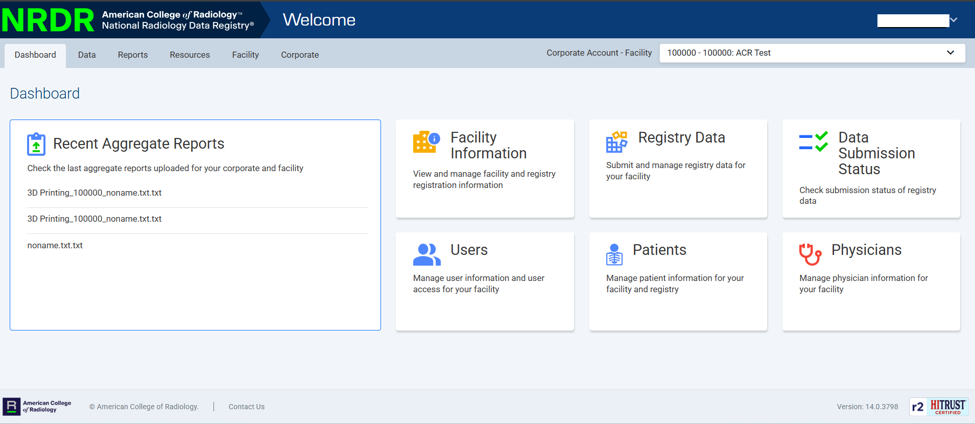
Main Navigation Areas
| Menu | Purpose |
|---|---|
| Data | Submit and manage registry data. |
| Reports | Access registry reports and analytics. |
| Resources | View guides, forms, dictionaries, and educational materials. |
| Facility | Manage facility information, users, and patients. |
| Corporate | Manage corporate account information and submission status. |
Dashboard
↓
Select Main Menu (Data, Reports, Resources, Facility, Corporate)
↓
Choose Registry or Feature
↓
Access Forms, Reports, or Management Tools
The left navigation menu changes based on the section or registry you are viewing and displays only the features available to your user role.
Data Submission Status
The Dashboard includes a Data Submission Status area showing:
- Facilities associated with your account
- Facility status
- Participating registries
- Current-year submission status
Submission status updates nightly.
Corporate Account Administrators may see additional options, including links to Corporate Accounts, Facility records, and the Add New Facility/Registry button.
Using Menus
- Expand or collapse menu sections using the arrow icons.
- Click a menu item to open the corresponding page.
- Select ACR NRDR Homepage to return to the main portal menu.
Do not use your browser's Back button when working in registry forms. Using the Back button may prevent your data from being saved. Always navigate using the portal menus.
Filters
Many pages include search filters that help you find data by date range or other criteria.
- Filters are often collapsed by default.
- Expand the filter section to enter your search criteria.
- Apply filters to narrow your results.
Error Messages
If invalid data is entered or an action cannot be completed, the portal displays error messages in red.
- Review all highlighted fields.
- Scroll through the page to locate additional messages.
- Correct the information before proceeding.
Session Timeout
Your session automatically expires after 20 minutes of inactivity. Any unsaved work entered since your last Save action will be lost.
Need Help?
For assistance with accessing or navigating the NRDR Portal, request support from the NRDR team.